Got the hoist yesterday, and raised the engine. The instructions say to apply the custom shims and the adapter plate (a heavy aluminum CNC piece), then mark the crankcase and cut off the portion below the shim/adapter. I foresaw that once I had mounted the adapter onto the locating pins, the fit was going to be too tight to allow easy removal of the adapter, and I didn't want to cut with it in place. So, I marked the line by using the shim, and clamped on a guide (piece of lath) for the cut.

After the cut
The actual cutting of the soft aluminum was not as easy as you'd think. I had a hacksaw, a Sawzall, a sabre saw, and a rotary grinder. The problem with cutting aluminum with a reciprocating blade is that it's easy to heat the teeth in the cut, at which point they fuse to the aluminum chips, get hotter, clog more, etc. I was able to complete the rough cut with the Sawzall and a coarse blade, using very little pressure and moderate blade speed, and clean it up with the grinder. At one point I tried the hacksaw, since I figured it wouldn't clog, but the rate of cut was almost zero, and I couldn't brace the engine well enough to work hard at it. I think the best tool for this would have been a hand-held bandsaw, using a blade lubricant.
Next, we mount the adapter:
In the photo above, the transmission studs have also been threaded in. I used a very large C-clamp to press the adapter onto the locating studs - the fit was extremely tight, and I hope I never have to remove it.

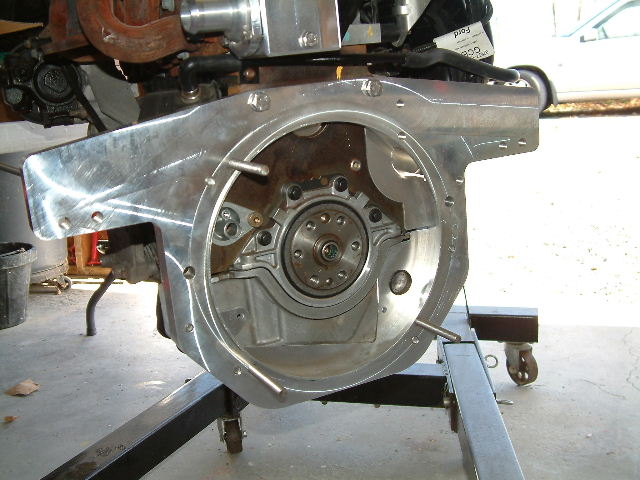
Above, the pilot bearing after driving it into the crankshaft socket. Next, the flywheel. The final steps in the instructions for the Adapter kit involve mounting the clutch disk and pressure plate, using parts from the old engine. Since I haven't removed the old engine yet, that section will get a yellow "TO DO" tag, and we'll move on to the Mounting kit. I can't go too far with the Mounting kit before I will need to have the old engine out, so I'm going to review the engine removal instructions and video and make a decision on moving ahead with that.
 The final steps in the instructions for the Adapter kit involve mounting the clutch disk and pressure plate, using parts from the old engine. Since I haven't removed the old engine yet, that section will get a yellow "TO DO" tag, and we'll move on to the Mounting kit. I can't go too far with the Mounting kit before I will need to have the old engine out, so I'm going to review the engine removal instructions and video and make a decision on moving ahead with that.