Here's the old engine with the transmission, pressure plate, and clutch disk removed. It was pretty difficult to separate the transmission from the engine, due to a very tight fit plus a small amount of corrosion, but a little penetrating oil plus a lot of careful tapping got it done:
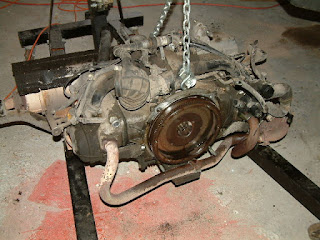 |
| Ready to store in the barn, until I get around to selling or recycling it. |
Once the transmission was removed, I removed the old release bearing. This was one part that was about to fail - completely dry, and just starting to get noisy. Maybe this starts to compensate for the alternator debacle.
Just in case you forgot what it looks like, here's the transmission on the cart, ready for the new release bearing:
That starter motor looks pretty tired. I need to look up what it costs to replace it and decide if it's worth it. It would be a lot easier, of course, to do it now, but I'm trying to limit additional spending.
Next, since I've moved the three small pins from the old flywheel to the new, we mount the pressure plate and clutch disk to the new engine's flywheel:
I bought a complete clutch "kit," which includes, according to its description, a pressure plate, friction disk, and release bearing. I also bought an alignment tool, since you need one to center the disk ($2.95). I was a little peeved to find, packed inside the kit, both an alignment tool and a new pilot bearing. So, now I have both of these and hope that I can find someone who can use them. I hope never to need to replace the clutch parts again (the old friction disk was about 75% worn, so it may have lasted for another 75K miles).
The new release bearing is mounted in the cleaned-up bell housing of the transmission:
The release shaft above the bearing looks clean because it is. For years I've wanted to get to it somehow and lube it, because it seemed that the clutch action was stiff. It wasn't easy, but I was able to free the inside circlip, then pull the shaft to the left and clean both the shaft and its bushings. Added new grease (you can see some of the red grease on the right), replace the seals and circlip, and it's now smooth and quiet. This is one of those tasks that needs to be done while the parts are accessible (there will be many more, I think), but adds an hour or so each time to the project timeline.
I may elaborate on this later (it took quite awhile), but in summary, I next assembled the new engine cradle and attached it to the engine as instructed:
Torqued all fasteners to spec, and ready to mount the transmission. That will be a wrestling match to be documented in the next post.


No comments:
Post a Comment